Imagine a world where your smartphone dances back to life without ever needing a cable—sounds pretty slick, right? Well, that’s the magic of wireless charging, and guess what? You don’t need to buy a fancy charger to join the party. You can make one yourself! That’s right, roll up your sleeves because we’re about to dive into the surprisingly fun world of DIY wireless charging projects.
Building your own wireless charger is like mixing a cocktail of tech and creativity. It’s not just for the tech wizards or the gadget gurus; it’s for anyone who loves a good project and is curious about how things tick. Plus, who doesn’t love the idea of blending style, function, and a bit of “do it yourself” flair into everyday items? This isn’t just about saving a few bucks on a store-bought charger (though that’s a nice perk); it’s about creating something uniquely yours that sparks joy every time your phone pings back to life.
So, whether you’re a DIY veteran ready to tackle your next tech venture or a newbie eager to create your first gadget, this guide will walk you through everything you need to know about wireless charging technology and how to set up your very own charger. Let’s get charged up and ready to create something awesome!
Understanding Wireless Charging Technology
Ever wondered how your phone charges just by sitting pretty on a pad? It’s not magic—it’s science, and pretty cool science at that! Let’s break it down into something a bit less geeky and more "everyday genius."
The Basics of Wireless Charging:
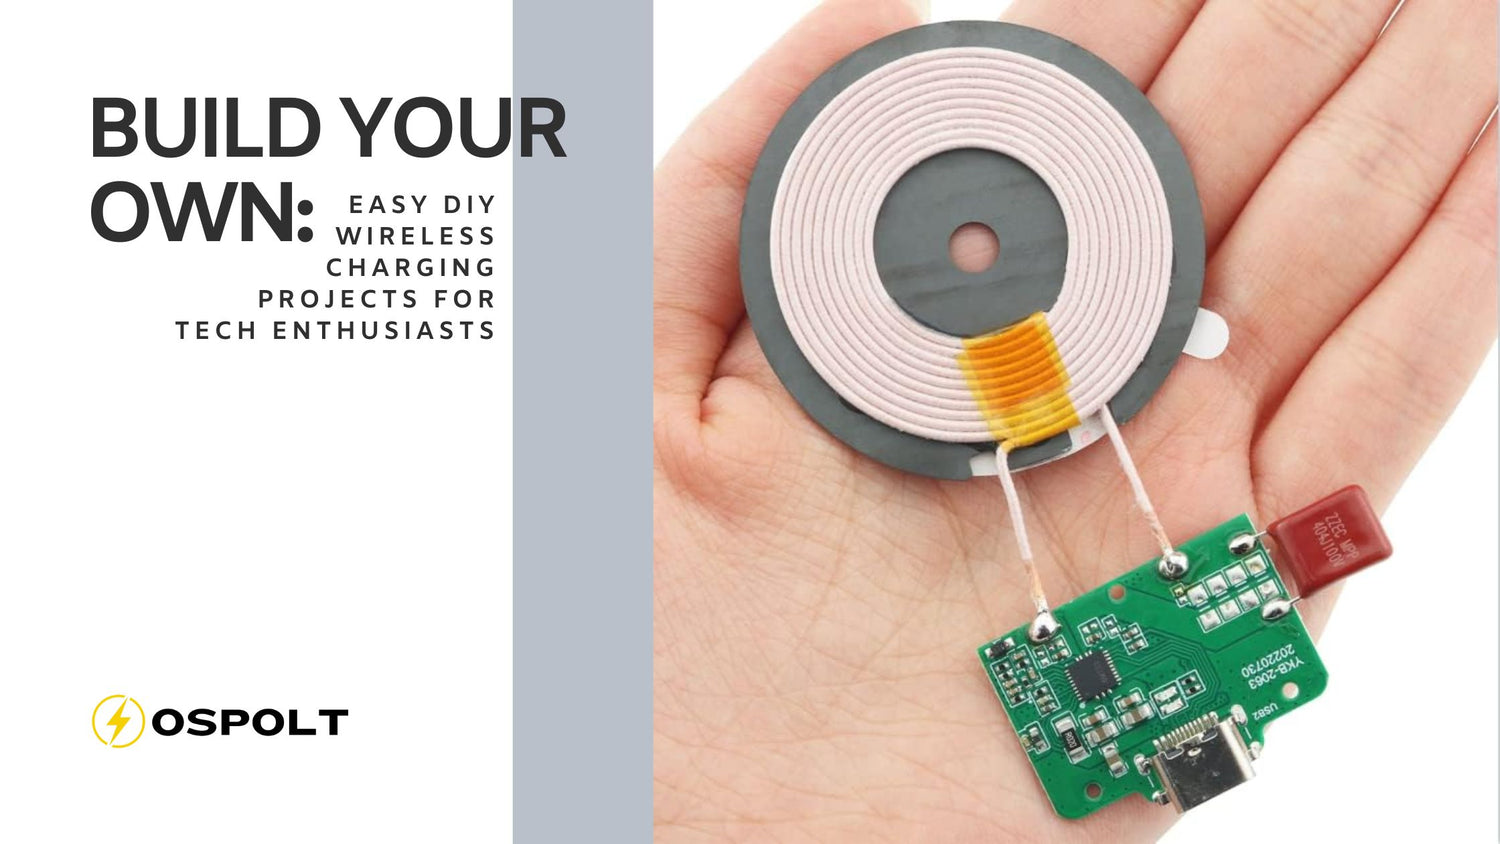
At its heart, wireless charging, or inductive charging if you want to sound fancy at your next dinner party, involves two main components: a transmitter and a receiver. The transmitter is your charging pad, and the receiver is typically built into your phone or in a special case you might add on. They both have coils—think tiny, flat spirals of wire.
When you plop your phone onto the charging pad, the pad's coil creates a small electromagnetic field. The coil in your phone picks up this field and converts it back into an electric current. Voila! Your phone starts charging, all without wires. It’s like throwing a paper aeroplane and having it magically refold itself into a bird. Okay, maybe not quite like that, but it’s still pretty amazing!
Why It’s Awesome:
Wireless charging is not just a nifty trick to cut down on cable clutter. It’s incredibly convenient. Imagine never having to fumble for your charging cable in the dark or disconnect a jumble of wires just to answer a call. With a wireless charger, you simply lift your phone off the pad, and you’re good to go. When you’re done, set it back down to keep the battery happy. It’s tech harmony at its best.
But, as with all great things, there’s a bit to consider to make the most out of it, especially if you’re thinking about building your own setup. You’ll need to know a little about the types of coils, the importance of alignment, and maybe a bit about the power requirements. Don’t worry, though; it’s nothing a brave DIYer like you can’t handle!
Step-by-Step Guide to Building a Basic DIY Wireless Charger
Are you ready to tackle a fun and rewarding DIY project? Building your own wireless charger is not only a great way to dip your toes into basic electronics but also a fantastic way to create a custom accessory for your tech gadgets. Let’s break down the process into detailed, manageable steps:
Materials You’ll Need:
Description: You can either buy a pre-wound copper coil or wind one yourself. A coil with a diameter suitable for the charging area of your phone is ideal.
Purchase Link: Buy Copper Wire Coil on Amazon
Description: This is the essential component that will enable your DIY charger to communicate with your smartphone.
Purchase Link: Buy Qi-Compatible Charging Circuit on Amazon
Description: Typically a USB wall adapter or any standard USB port. Make sure it matches the input requirements of your charging circuit.
Purchase Link: Buy USB Wall Adapter on Amazon
Description: Used to safely cover any exposed wires or terminals.
Purchase Link: Buy Insulating Tape on Amazon
Description: This will house your wireless charger. You can choose something simple like a plastic box, or get creative with a decorative tin or a custom-made wooden case.
Purchase Link: Buy Project Enclosure Box on Amazon
Assembly Instructions:
Step 1: Winding the Coil
If you're making your own coil, take the copper wire and wind it tightly into a circle with a diameter of about 2-4 inches, depending on your phone size. Aim for 10-15 complete loops. Secure the end of the wire with tape to prevent unwinding.
Step 2: Attaching the Charging Circuit
Connect the two ends of your copper coil to the input terminals on the Qi-compatible charging circuit. If you’re comfortable with soldering, carefully solder the wires to the terminals for a more secure connection. Otherwise, twisting the wires tightly and covering them with insulating tape can also work effectively.
Step 3: Powering Up
Attach your charging circuit to your power source. This typically involves connecting a USB cable to the circuit’s input. Ensure that the connection is snug and secure. If your circuit has any indicators, look for a light that confirms power is being supplied.
Step 4: Testing Your Setup
Before proceeding with enclosing everything, conduct a test. Place your smartphone on the coil to see if it begins charging. If nothing happens, double-check your connections, ensure the coil is properly aligned with the phone's charging center, and confirm that your phone supports wireless charging.
Step 5: Final Assembly
Once you’re satisfied with the functionality, place the circuit and coil securely inside your chosen casing. Position the coil so it aligns with where your phone will rest. Close the casing, but consider designing it in a way that allows easy access in case future adjustments are needed.
Step 6: Customizing the Design
Now for the fun part—personalize your charger! Whether it’s painting the case, adding decorative elements, or embedding it into a piece of furniture for an integrated look, make it a reflection of your style.
Safety Precautions:
- Keep the charger in a cool, dry place to avoid overheating.
- Regularly inspect the device for any signs of wear or loose connections.
- Always disconnect the charger from the power source before making any adjustments.
Troubleshooting Common Issues
Even with the best preparation, sometimes things don’t go as planned. Here are some common issues you might encounter while assembling your DIY wireless charger and practical tips to fix them:
- The Charger Isn’t Working
Check Connections: Ensure all connections are secure and properly insulated. Loose or poor connections are often the culprit in DIY electronics.
Review Coil Alignment: The coil must be properly aligned with your phone’s wireless charging receiver. Misalignment can result in ineffective charging.
Power Source Check: Verify that your power source (e.g., USB adapter) is functioning correctly and providing adequate power to the circuit.
- The Charger is Overheating
Inspect Coil Winding: If the coil is wound too tightly or unevenly, it can cause overheating. Make sure the coil is evenly spaced and securely fixed.
Evaluate Enclosure Ventilation: Ensure your charger’s enclosure has enough ventilation to dissipate heat effectively. Overheating can degrade the charger's performance and damage your phone.
- Intermittent Charging
Stable Setup: Movement during charging can disrupt the connection. Ensure your charger is on a stable surface and the phone is resting securely on the coil.
Check for Interference: Metal objects or electronic devices near your charger can cause interference. Keep the charging area clear of potential disruptors.
- Slow Charging
Power Output Assessment: Make sure your power adapter and circuit are capable of delivering enough output for effective charging. Some phones require higher power levels to charge efficiently.
Cable Quality: Use high-quality, undamaged cables for connections. Poor quality or damaged cables can reduce charging efficiency.
- DIY Modifications Not Functioning
Revisit Modifications: If you’ve attempted to add custom features like LED indicators or multiple charging ports, revisit your modifications. Ensure that added components are compatible and correctly integrated into the circuit.
- Safety Concerns
Routine Checks: Regularly check your DIY charger for any signs of wear, tear, or exposed wires. Address these issues promptly to maintain safety.
Avoid Overcharging: To prevent overcharging your device, consider adding a timer or an auto-off mechanism to your circuit if it doesn’t already have one.
Conclusion
Congratulations on stepping into the world of DIY wireless charging! Whether you've successfully built your first charger or are troubleshooting through a few hiccups, you're now part of a community that values creativity, innovation, and practical solutions. By embarking on this project, you've not only gained a useful gadget but also deepened your understanding of how wireless charging technology works.
Building your own wireless charger is more than just about saving money or reducing clutter—it's about taking control of your technology and customizing it to fit your lifestyle. The skills you've honed and the knowledge you've acquired will serve you well in future projects and might even spark new ideas for further tech DIY adventures.
Remember, the process of creating is as valuable as the final product. Each challenge you overcome and every solution you devise adds to your experience and confidence in handling technology. So, keep experimenting, keep learning, and most importantly, keep enjoying the process of making something by hand.
If you encounter any issues or need advice, the DIY community is vast and often eager to help. Share your projects, seek out advice, and perhaps inspire others by showing what’s possible with a bit of ingenuity and effort.
Leave a comment
All comments are moderated before being published.
This site is protected by hCaptcha and the hCaptcha Privacy Policy and Terms of Service apply.